Create Origami Flowers to Learn About Fractions: 3rd Grade Math Integrated Art Lesson
Lesson Objectives:
- Students will be able to create a sculptural three-dimensional form using origami and math theory.
- Students will utilize third grade math concepts in order to be successful in their art lesson.
- Students can identify and show fractions using figures, numbers, and terms.
- Students can understand and use key terms related to fractions.
This lesson meets the following common core objectives:
CCSS (3.OA.2) I can understand division by thinking how one group can be divided into smaller groups.
(3.NF.1) I can show and understand that fractions are equal parts of a whole.
(3.NF.3) I can explain in words or pictures how two fractions can sometimes be equal.
(3.NF.3) I can compare fractions by reasoning about their size.
(3.NF. 3) I can show whole numbers as fractions. (3=3/1).
(3.NF.3) I can recognize fractions that are equal to one whole.
Materials Required:
- Assorted square origami paper
- Glue
Lesson Procedure
1. Students can follow an assortment of instructions available all over the internet. I have found that the best way to approach it is to do a full petal with students simply watching the teacher demonstration first. Here are two resources I’ve used in learning how to make the orgami flower: <strong>https://foldingtrees.com/2008/11/kusudama-tutorial-part-1/</strong>, and <strong>https://www.youtube.com/watch?v=eQ5aqld7XS4</strong>
2. After watching the teacher demonstration the students do the lesson with the teacher who is pointing out the fractions, and math vocabulary along the way.
a. Fold the square point to point keeping the color visible after the fold, thus folding the paper in half.
b. Bring the two corner points up to the center point of the triangle to form a diamond shape.
c. One at a time bring the inner center folded edge to the outside edge, repeat with the other side.
d. Open one side of the fold and crease it so it has the appearance of a kite, repeat with the other side.
e. Fold the tip of the ‘kite’ shape down, repeat with the other side.
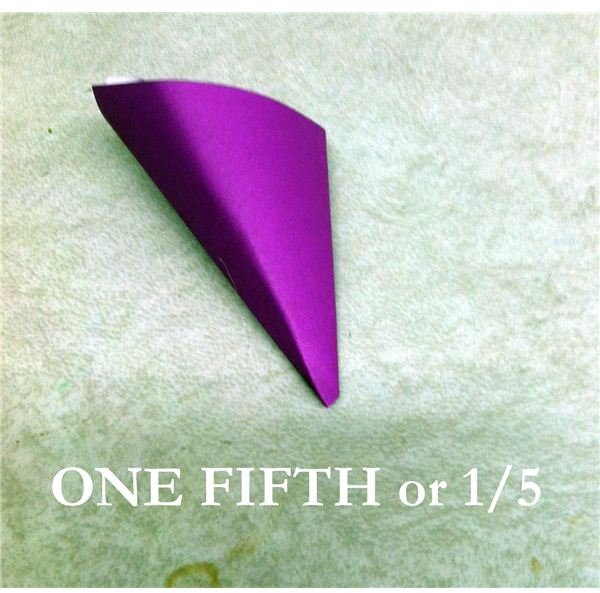
f. Using a sturdy glue, preferably hot glue, attach the two outer edges to create one fifth of the entire flower.
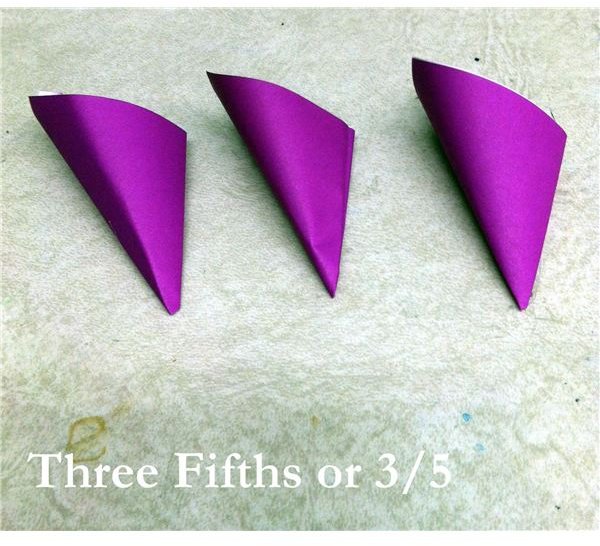
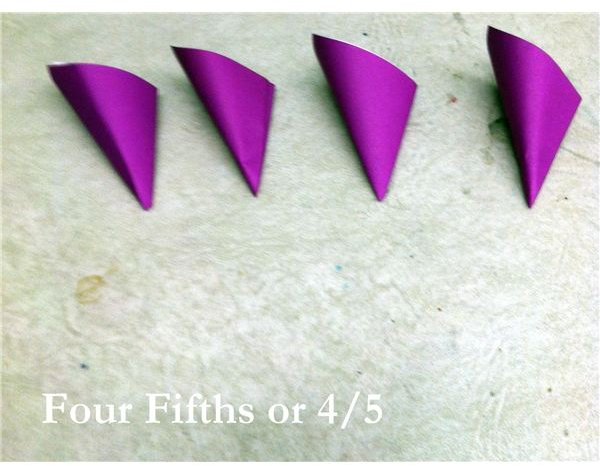
g. Repeat these steps to create an additional four flowers.
3. At this point the teacher can explain that they have now created 1/5 of the necessary petals to get to a whole flower. Discussion is also focused on symmetry in the folding, as well as precision and craftsmanship.

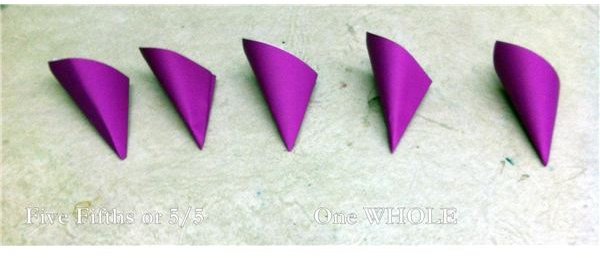
This project lends itself well across a variety of grade levels, as it is accessible developmentally to third through fifth graders. Origami, symmetry, and math go hand in hand in this lesson that can easily be tied into holiday celebrations, or simply for the pleasure of creating art. With the younger grades I hot glue the five petals together for them as a means to create a final frustration free piece. Glue sticks and Elmers glue are sufficient for the single petal, but for the final piece I would highly recommend using hot glue.
This post is part of the series: Math Integrated Art Lesson Plans
These art lesson plans incorporate some math into the project. Adaptable for grades 3, 4 and 5 and meet Common Core Objectives. Have fun and create art while learning math concepts!